Introduction
If you have created your own website or blog then you must have one important wish your articles should appear in Google Search and people should search and visit your website.
But a beginner might have a few questions. How does Google know about my website? How do I check if my article is indexed? And how do I find out if my website has any indexing issues?
Google Search Console is a useful free tool to understand these questions.
Google Search Console setup. The process is not difficult. You need a Google Account then open the official Search Console website and add your website. Google then needs to verify that you own the website or have permission to manage it.
In this guide we will first learn how to create an account then add a website select a domain or URL prefix property verify ownership submit a sitemap and check indexing.
I will also mention practical screenshot placement with every important step so that you can follow the process by watching it on the screen and not just reading the instructions.
Important: Creating a Search Console account does not automatically rank or index your website in Google. This tool provides you with reports and information that can help you monitor and improve your website.
What You Need Before Creating a Google Search Console Account
It is best to have a few basic things ready before creating a Google Search Console account. This will prevent unnecessary problems during setup.
A Google Account
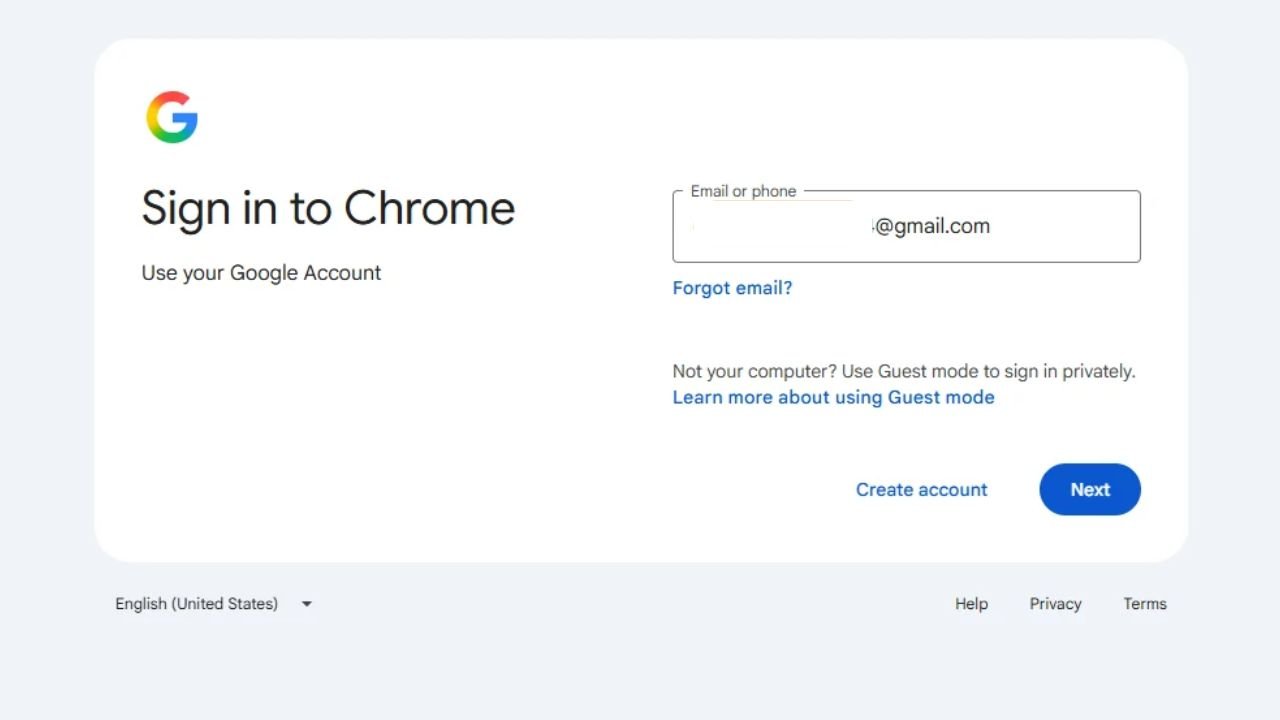
First you need a Google Account. You can sign in with your existing Gmail account.
If you Do not have a Gmail address you can create a Google Account. Remember Gmail and a Google Account are not exactly the same thing: Gmail is a Google service while a Google Account lets you access multiple Google services.
Your Website URL
You should also know the correct URL of your website.
For example:
- https://example.com
- https://www.example.com
Open your website in your browser and check which address it loads at. It is also important to understand the difference between HTTPS and HTTP especially when adding the URL prefix property.
Access to Your Website or Domain Settings
To verify website ownership you may need access to your website or domain settings.
If you use WordPress access to the WordPress dashboard will be useful. If you choose a domain property you may need to add a txt record to your domain provider is DNS settings.
A small tip: Keep your Google Account secure. Do not share your password with anyone you Do not know. If you need to give a developer access to manage your website use the Search Console permissions option instead of sharing your password.
How to Create a Google Search Console Account Step by Step
Now let’s get down to the process. In this section you will learn how to create a Google Search Console account and add your website to get it set up.
You can follow these steps from a desktop or laptop browser. You can also open the website from a mobile browser but a desktop screen will be more convenient for practical setup and screenshots.
Step 1: Open the Official Google Search Console Website
First of all open Google Chrome Firefox or Edge in your browser.
Now type the official website in the address bar:
https://search.google.com/search-console
After pressing Enter the Google Search Console page will open.
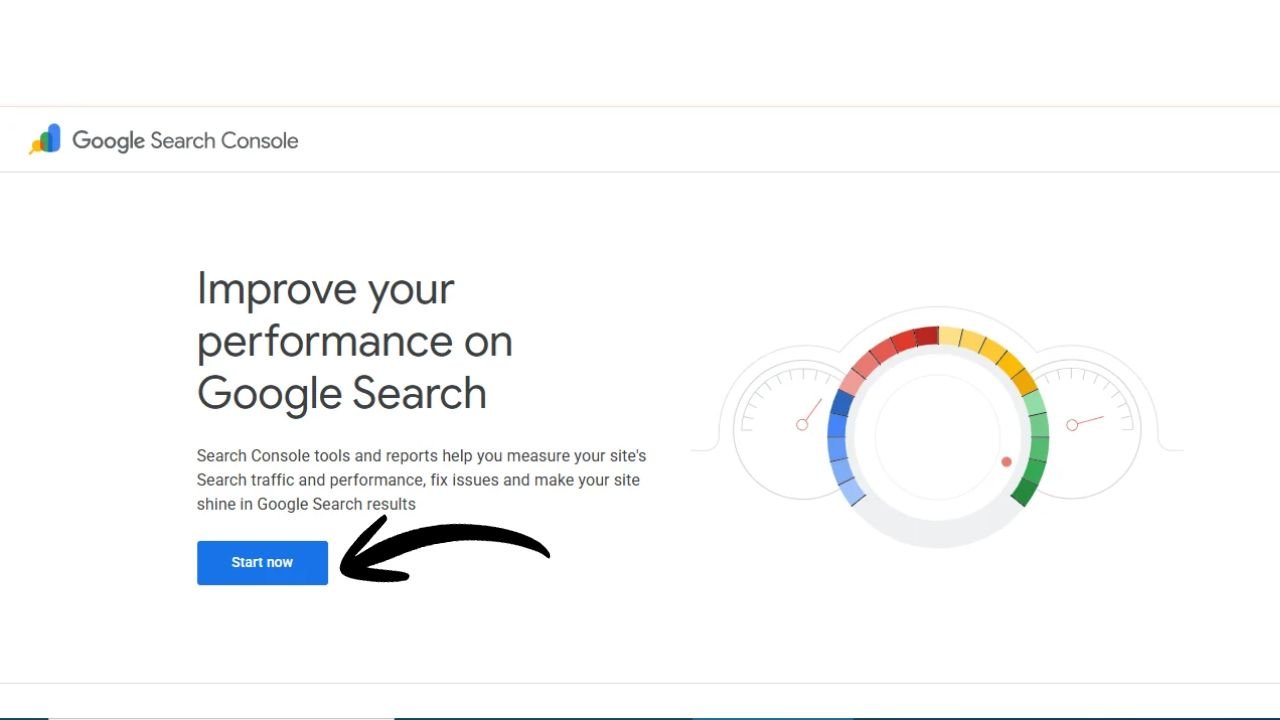
Here you have to sign in or Start now If you are already signed in to your Google Account you may also see the next setup screen directly.
Step 2: Sign In With Your Google Account
Ab Start now Click on it.
If you are not signed in Google will ask you to select an account or sign in.
Enter your Google Account email address and password to complete the sign in.
If multiple Google Accounts are logged in to your browser select the account you want to use for Search Console management of your website.
Meri advice: Use a Google Account for your website that you I will have long term access to. This will make it easier to manage website reports and permissions in the future.
Step 3: Understand the Search Console Property Setup Screen
After signing in Search Console will give you the option to add a website or property.
Here you will generally get two choices for website property:
There is no need to worry. Both are aimed at adding a website to Search Console but their coverage and verification methods differ.
If you choose Domain property data from different subdomains and http/https versions of your website can be covered in one property.
The URL prefix property only includes URL is that match the exact prefix you entered.
Before selecting these two options it is important to understand their difference. We I will explain them with examples in the next section.
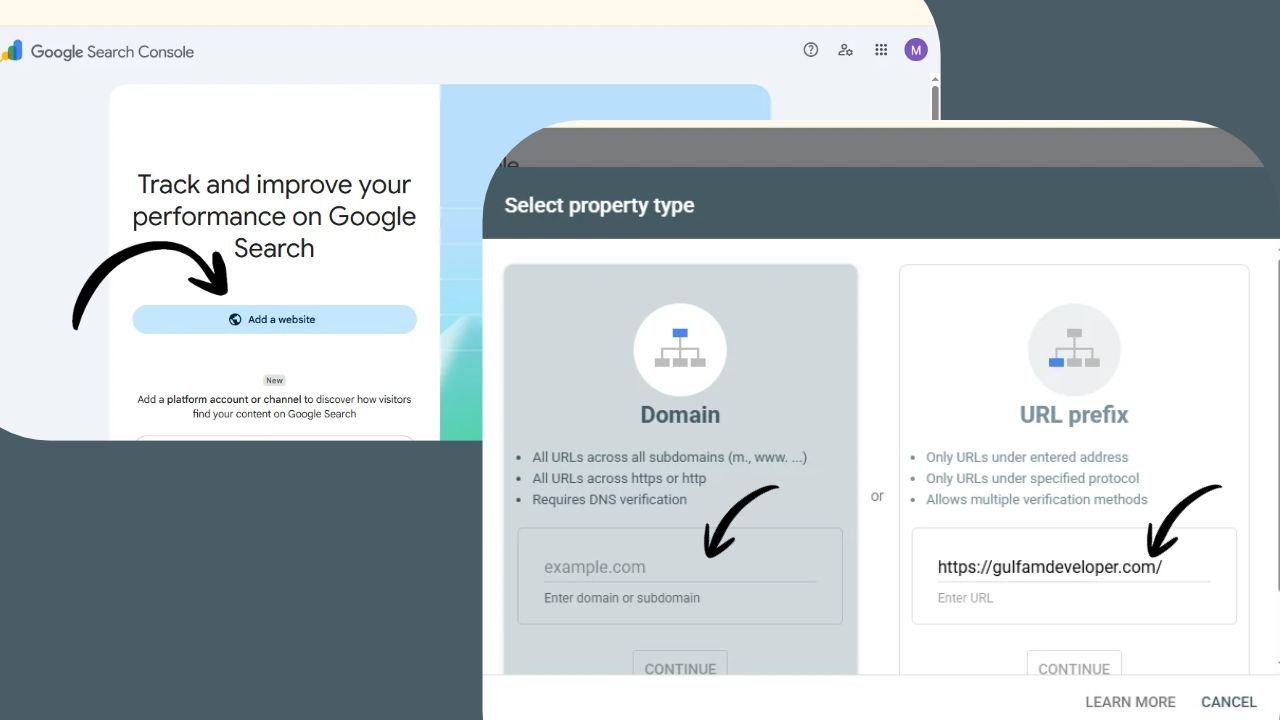
Step 4: Add Your Website as a Property
Now you have to add your website to Search Console.
If you choose Domain property enter only the root domain in the domain field.
Example:
example.com
Is field mein https://Or do not add the path of any page of the website.
If you choose the URL prefix property enter the complete website URL.
Example:
https://example.com/
The distinction between HTTPS www and non-www is important here. You should enter the URL prefix that matches your website is actual address.
After entering the details Continue Click on it. Search Console will now show you the ownership verification process.
Step 5: Complete the Website Ownership Verification
After adding the website the next important task is to verify the ownership.
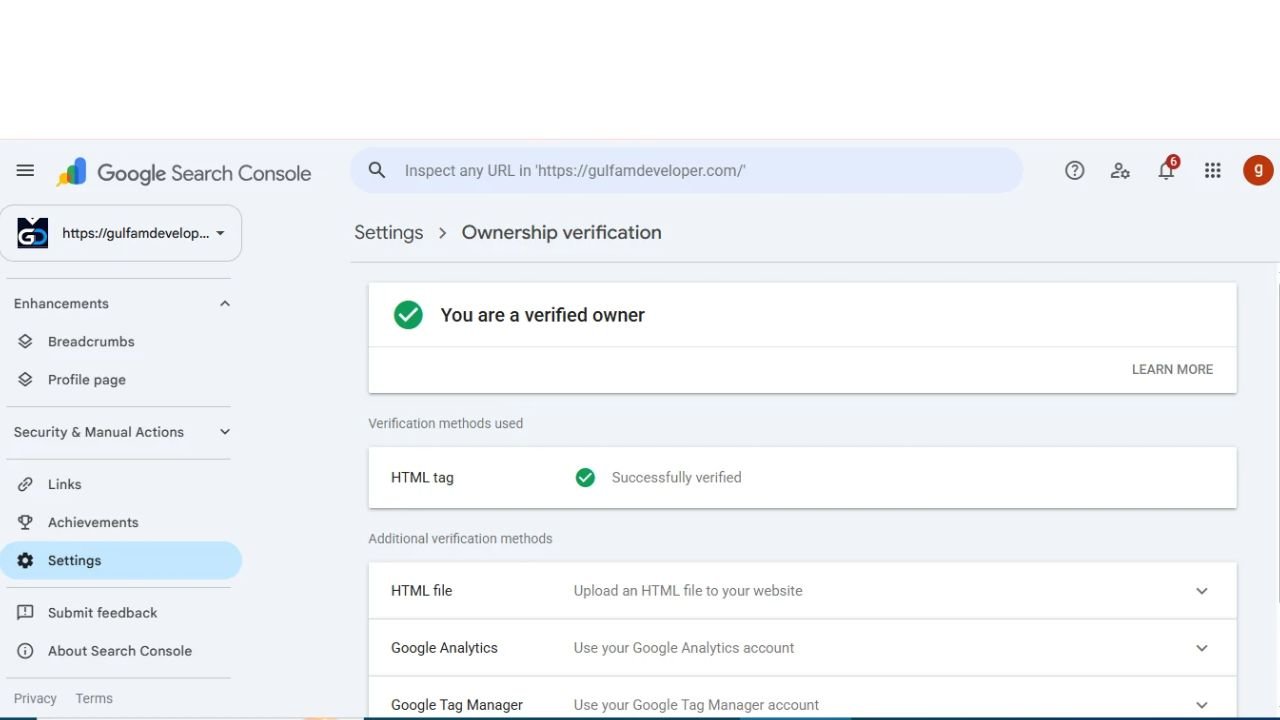
Its simple meaning is that Google wants to confirm whether you are the owner of the website or you have proper access to manage that website.
The methods available for verification may vary depending on the property type and website setup.
For example:
- DNS verification is required for domain property.
- HTML tags HTML file uploads and some other supported methods may be available for the URL prefix property.
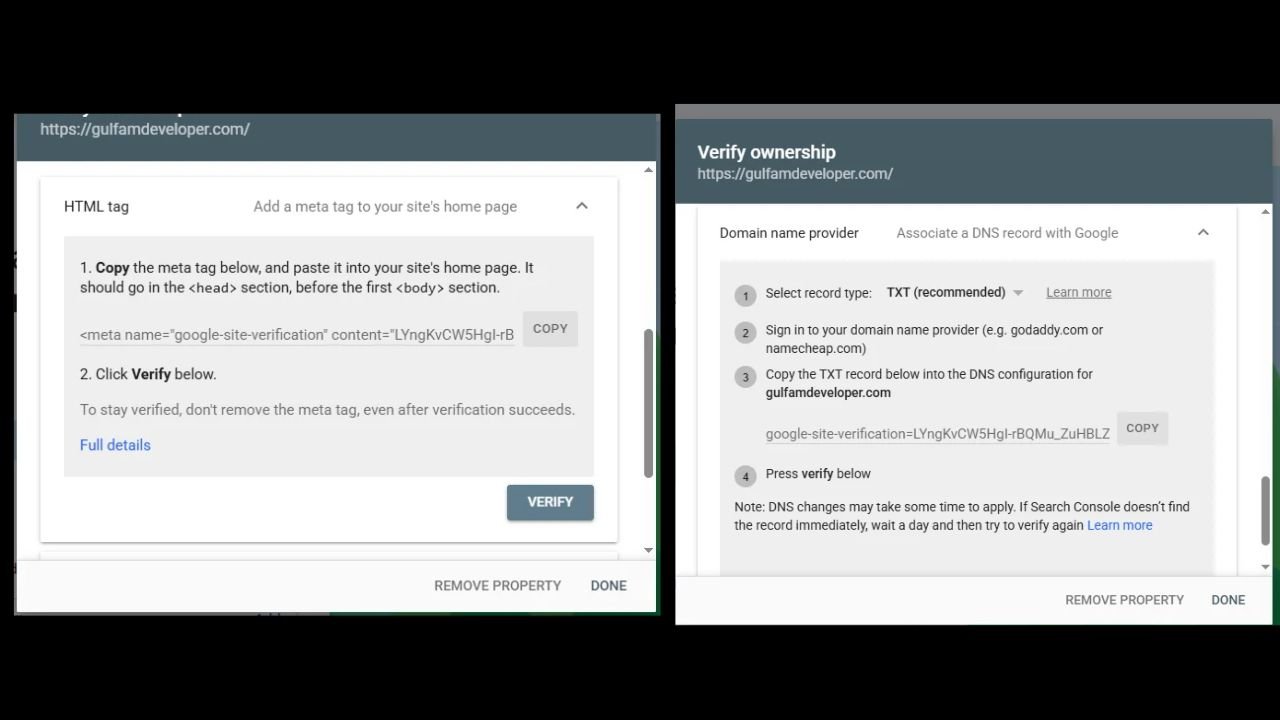
- If the website already has an eligible Google Analytics or Google Tag Manager setup then the option of verification through them may also be available.
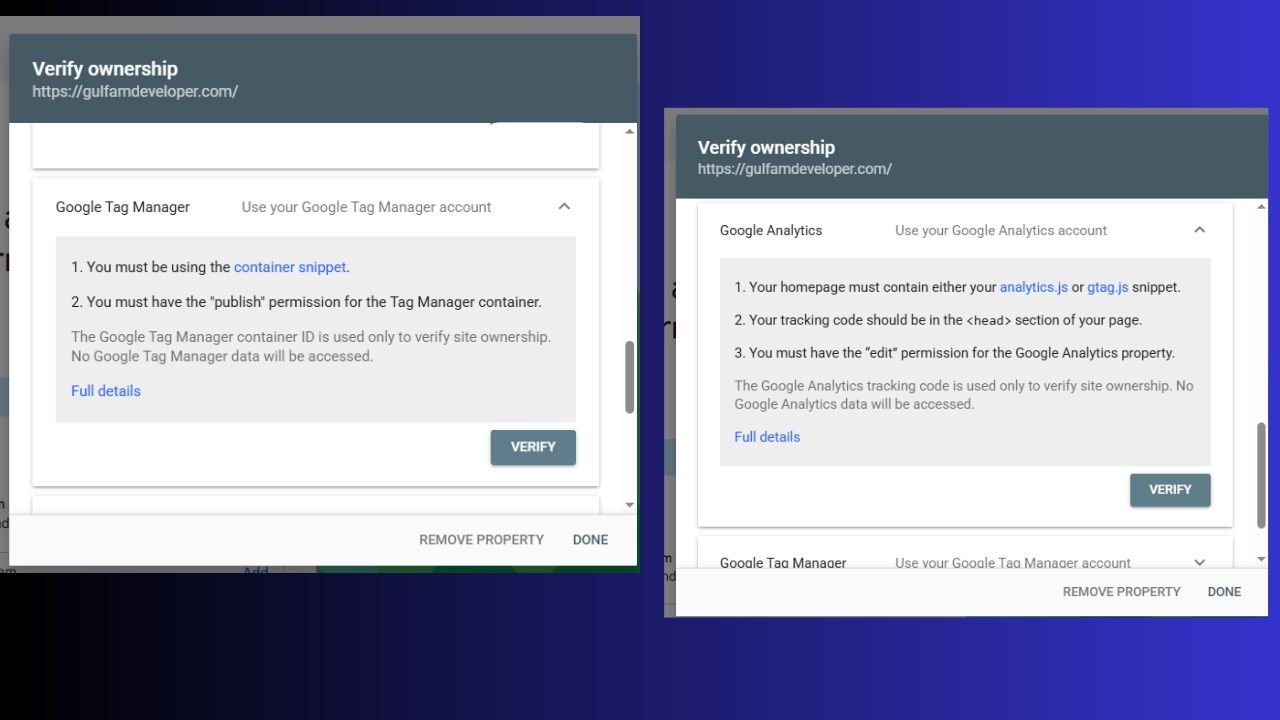
After selecting the verification method carefully follow the instructions given on the Google screen.
Important :Do not delete or remove the verification token until you have properly set up an alternate verification method. Google periodically checks the verification. If the token is removed ownership verification may fail.
Step 6: Check Whether Your Website has been Added Successfully
After the verification is complete Search Console will give you the option to open your property.
Select your website in the Property selector. You can now access the Search Console dashboard and reports.
If the reports are still empty it does not necessarily mean setup failed. It may take a few days for the data to appear in Search Console and the data will only be available when Google has data on relevant search activity for your website.
Domain Property vs. URL-Prefix Property: Which One Should You Choose?
When you add a website to Google Search Console you get two options: domain and URL prefix. Beginners often get confused about which option to select.
The purpose of both options is to monitor the website but the coverage of both is different.
What Is a Domain Property?
Domain property Your complete domain that cover She Does including it is subdomains and HTTP/HTTPS versions.
For example if you example.com If you add . as a domain property it may cover these variations:
- https://example.com
- http://example.com
- https://www.example.com
- https://blog.example.com
When adding a domain property enter only the root domain:
example.com
https:// http:// wwwOr not adding the URL of any page.
Verifying this property requires DNS record verification. You need to add the TXT record provided by Google to your domain provider is DNS settings.
What Is a URL-Prefix Property?
The URL prefix property only covers the specific URL prefix that you enter in Search Console.
For example if you add these URLs:
https://example.com/
So this property will cover URLs that fall under this HTTPS version and the specified prefix. HTTP or a different subdomain is not automatically included in this property.
In the URL prefix property you can use HTML tags HTML file upload and some other supported verification methods.
Domain vs. URL Prefix
Feature
Coverage
Example
DNS verification
HTML tag verification
HTML file verification
Best use
Domain Property
All supported subdomains and protocols
example.com
Required
Not supported
Not supported
Complete domain monitoring
URL-Prefix Property
Exact URL prefix
https://example.com/
One available option
Supported
Supported
Specific website version or URL prefix
My recommendation: If you have access to your domain is DNS settings a domain property is a convenient choice because it covers different subdomains and protocols in one property.
If you can not access the DNS settings you can start with the URL prefix property. It is important to choose the correct option for your website.
Google of official explanation: Add a website property to Search Console.
How to Verify Your Website Ownership in Google Search Console
After adding the website Google will ask you to complete the ownership verification.
This step cannot be skipped. Verification allows Google to confirm that you have the authority or access to manage the website.
Method 1: Verify Your Domain Through DNS TXT Record
If you have selected Domain property then DNS verification will have to be used.
In this method Google provides you with a unique TXT record. You need to add this record to your domain provider is DNS management area.
Step by step process:
- Select your domain property in Search Console.
- Ownership verification window mein DNS Make record method open .
- Copy the TXT record given by Google.
- Open the website of your domain provider from where you purchased the domain.
- Go to DNS Management or DNS Records section.
- Add a new TXT record.
- Fill in the Host/Name field and TXT Value field as per the provider is instructions.
- Save the record.
- Come back to Search Console and Verify Click on it.
Important: DNS changes can take time to be updated online. If verification is not immediately successful wait a while and try again. When copying the record is value be careful for extra spaces or missing characters.
If DNS verification fails do not delete the record and then repeatedly add a new record. First check that the correct domain and TXT value are used.
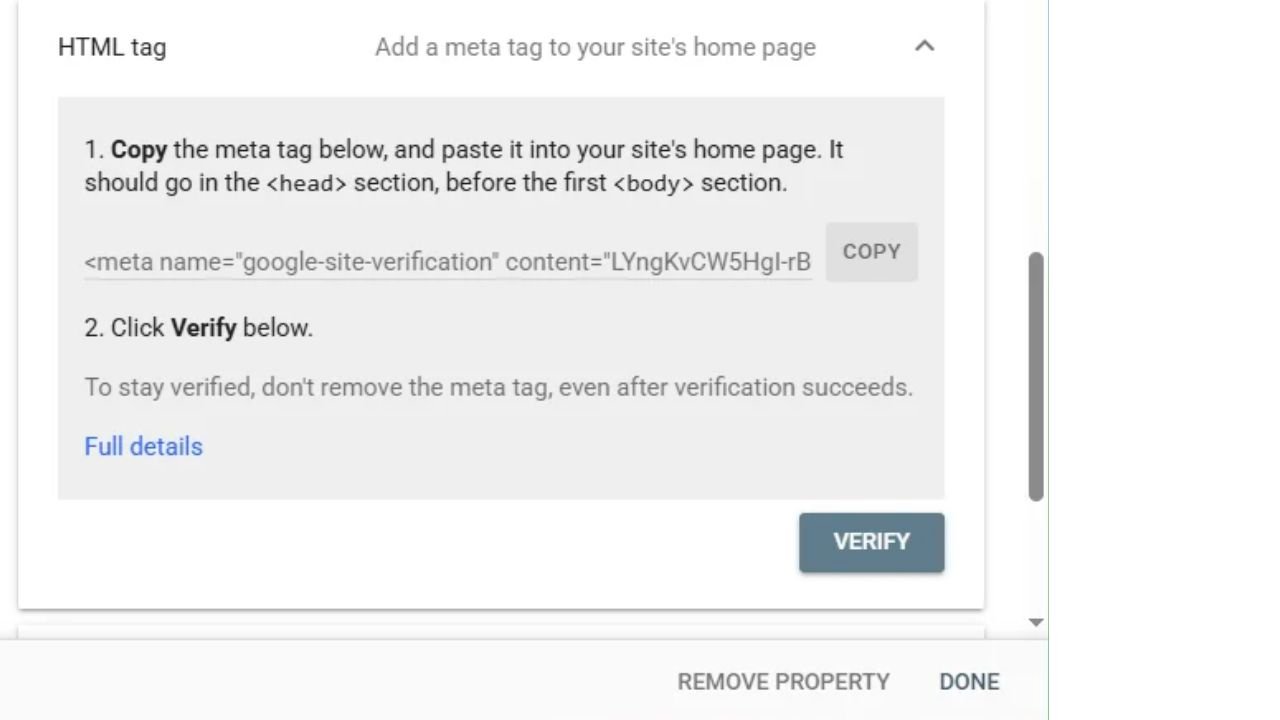
Method 2: Verify a Website Using an HTML Meta Tag
If you are using the URL prefix property HTML meta tag verification is a useful option.
In this method Google gives you a special meta tag. You can add this tag to the HTML of your website is homepage. head It has to be added in the section.
Step by step process:
- Select your URL-prefix property in Search Console.
- HTML tag verification method choose.
- Copy the complete meta tag given by Google.
- Login to your WordPress dashboard.
- Use a trusted method that stores the verification code on the website is homepage. head section.
- Save the code.
- Returning to Search Console Verify Click on it.
<image placeholder: Add a screenshot of the HTML tag verification method in Search Console. Blur the unique verification content before publishing.>
Example of a meta tag format:
<meta name=”google-site-verification” content=”YOUR-UNIQUE-CODE” />
This is just an example. Paste the original tag provided by Google on your website.
Method 3: Verify Your WordPress Website Using an SEO Plugin
If you use WordPress and Do not want to manually edit HTML code you can use the supported verification fields of a trusted plugin.
For example Yoast SEO may have Site Connections settings available. Check the option to enter a Google verification code there.
General process:
- Open the WordPress dashboard.
- Open Yoast SEO Settings.
- Site connections section locate.
- Paste the verification code you received from Search Console into its Google verification field.
- Save changes.
- Returning to Search Console Verify Click on it.
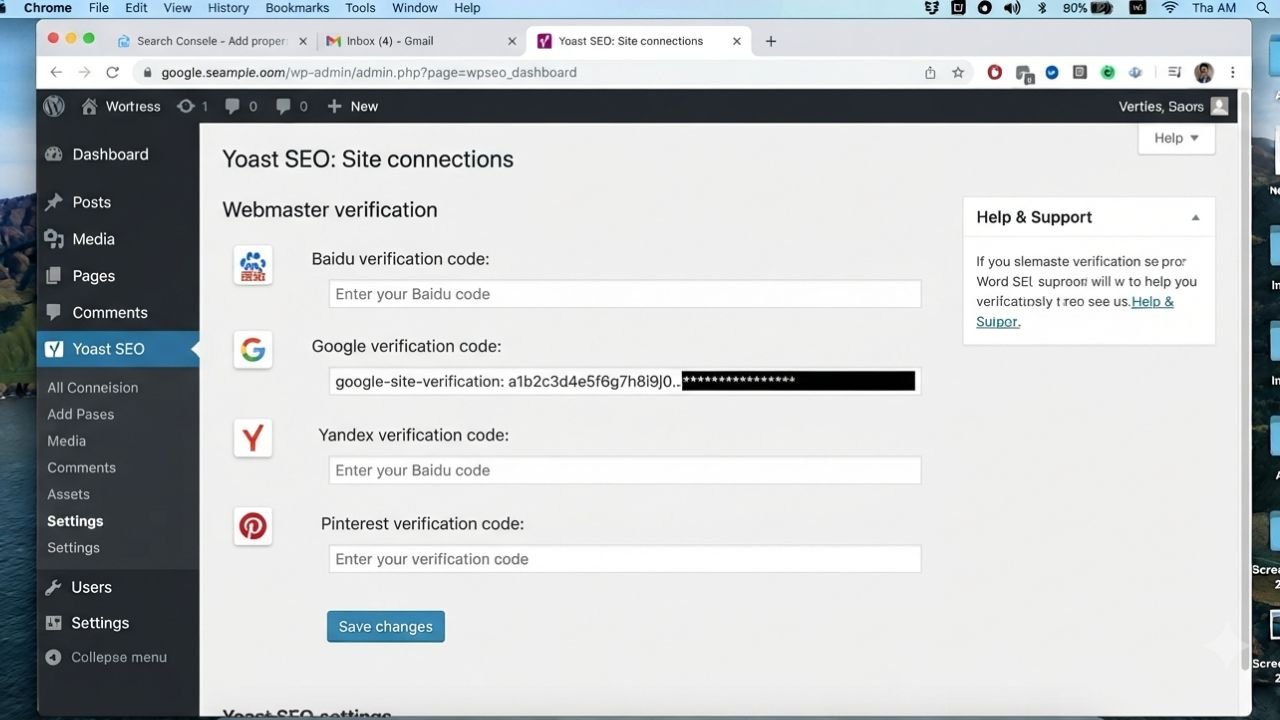
If this option is not available in your Yoast version check the plugin is current documentation or consider using Google is official Site Kit for WordPress.
One important thing: Do not remove the meta tag after saving it. Google may recheck ownership. If the tag is removed verification may be lost.
Method 4: Verify Using an HTML File
HTML file upload is also a supported verification method for the URL prefix property.
Google provides a special verification file. You need to download this file and upload it to the website’s root directory.
Steps:
- Select HTML file verification in Search Console.
- Download Google is verification file.
- Open your hosting account is File Manager or supported file upload method.
- Upload the file to the root directory of the website.
- Open the file URL given by Google in the browser and check it.
- Return to Search Console Verify Click on it.
The file is name and content should not be changed. If the file is uploaded to the wrong directory or public access is not available Google will not be able to find it.
Which Verification Method Is Best for WordPress Users?
Verification Method
DNS TXT Record
HTML Meta Tag
HTML File Upload
Google Analytics
Google Tag Manager
What You Need
Domain DNS access
Homepage head access
Website root directory access
Eligible existing Analytics setup and permissions
Eligible container and permissions
Property Support
Domain and URL prefix where offered
URL prefix
URL prefix
URL prefix
URL prefix
The best method for you is the one you have access to. Do not choose a DNS method just because it is Famous if you Do not know how to manage DNS settings it may be easier to start with a URL prefix property and a supported verification method.
Recent Post
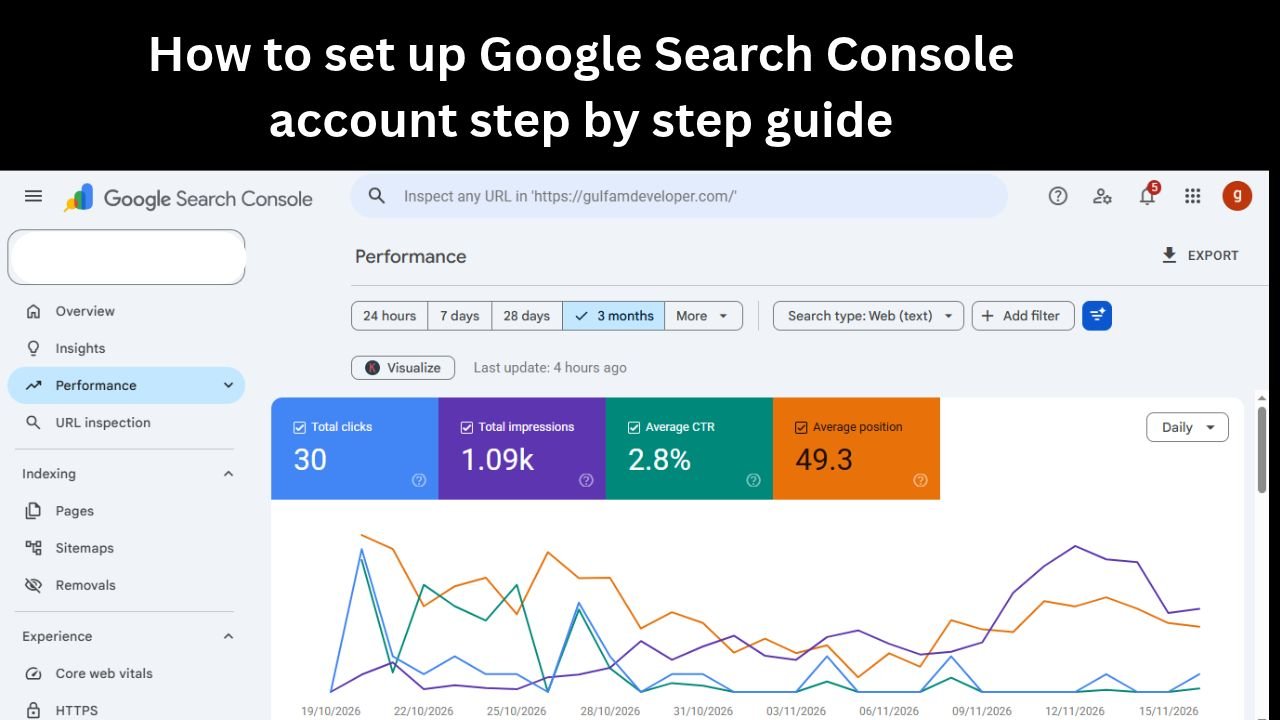
How to set up Google Search Console account step by step guide